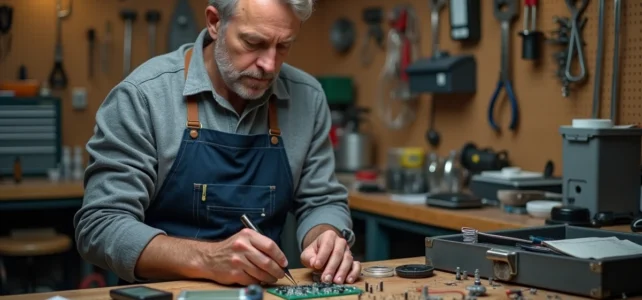
A DIY or home electronics project relies on three elements: choosing the right materials for the task, preparing the workspace, and mastering the safety rules specific to each type of intervention. Before drilling, soldering, or wiring, every action must be anticipated to avoid costly rework and accident risks.
Electrical safety and smoke detector: the obligations to know before DIY
Any intervention on a domestic electrical circuit begins with turning off the main circuit breaker. Checking for the absence of voltage with a VAT (voltage absence tester) is not an option reserved for professionals: it is the first action to learn.
A point often overlooked in DIY guides concerns the mandatory fire detection in every home. Since the enactment of the Morange law in 2015, every dwelling must have at least one standardized smoke detector NF EN 14604, installed by the owner. Regular maintenance (monthly button test, battery replacement) is the responsibility of the occupant.
This obligation has a direct link to home electronics projects. Installing an LED circuit, modifying a power supply, or adding a connected thermostat can generate localized heating if the sizing of the conductors is insufficient. A functional detector serves as the last safety net in case of a fault.

Online resources like bricotronique.com detail common electronic setups with associated precautions, allowing you to verify a schematic before implementing it.
Semi-professional tools for home DIY: choosing the right range
Tool manufacturers have recently offered a mid-range between consumer and professional. Cordless screwdrivers with adjustable torque, self-tightening chucks, break-resistant bits: these features, once reserved for craftsmen, are now found in tools designed for furniture assembly and small home projects.
The interest in this mid-range does not lie in the price. It lies in reducing the risk of error. An adjustable torque on a screwdriver prevents splitting the wood by over-tightening. A self-tightening chuck avoids the drill bit slipping on tiles.
Selection criteria for a versatile workshop
- The battery system: favor a single platform compatible with multiple tools (drill, jigsaw, sander) to avoid multiplying chargers and battery formats
- Torque and variable speed: a tool with at least two speeds allows switching from precise screwing in softwood to drilling into a brick wall
- Weight and balance: for overhead work or prolonged soldering, a tool that is too heavy strains the wrist and reduces precision
- Availability of consumables: drill bits, blades, and screwdriver bits should be easily found, including outside the original brand
Buying a high-end professional tool to screw three shelves a year is a poor calculation. A well-chosen semi-pro tool covers the majority of home projects without compromising reliability.
Project preparation: the invisible work that avoids rework
Most DIY failures do not stem from a lack of technical skill. They arise from insufficient preparation. Taking measurements to the millimeter, identifying the nature of the substrate (drywall, brick, concrete), checking the passage of electrical conduits behind a partition before drilling: these steps determine success far more than the brand of the drill.
Marking and tracing techniques
A stud and cable detector costs a fraction of the price of a repair after drilling into a pipe. For electronics projects, a simple multimeter allows you to check the continuity of a circuit, the voltage of a power supply, or the polarity of a component before powering it on.
Marking on the wall or on the piece of wood is done with a grease pencil, never with a permanent marker. A laser level advantageously replaces a bubble level for long alignments. These details may seem trivial, but they separate a clean result from a rough assembly.

Home electronics projects: where to start
Electronics at home is not limited to replacing a switch. Installing LED lighting with a dimmer, setting up a basic home automation system, or assembling a connected weather station kit are accessible projects with an entry-level soldering iron and a few components.
Learning to read an electronic schematic is a prerequisite. A schematic indicates the value of components (resistors, capacitors), their positioning, and the direction of current. Without this understanding, connecting a component backward destroys the circuit on the first attempt.
Basic equipment to start in electronics
- A temperature-controlled soldering iron (not a soldering gun) with a fine tip for through-hole and large SMD components
- A digital multimeter capable of measuring voltage, current, resistance, and continuity
- A breadboard for prototyping without soldering before finalizing a setup
- Lead-free solder and desoldering braid to correct mistakes
Prototyping on a breadboard is a step that many beginners skip to save time. Testing a circuit before soldering significantly reduces the failure rate.
Tool maintenance and storage of electronic components
A drill bit that overheats because it is dull damages the material and strains the drill motor. Sharpening metal drill bits, cleaning the brushes of a power tool, greasing the chuck: these actions extend the lifespan of the equipment by several years.
For electronic components, humidity is the main enemy. Integrated circuits and electrolytic capacitors degrade in a humid environment. Storing components in anti-static bags, in an airtight box with a silica gel packet, is enough to prevent oxidation of the leads and loss of reliability.
A well-organized workshop, with a clear workspace, adjustable lighting, and storage categorized by components or fasteners, transforms each intervention into a methodical operation rather than a hunt for lost materials.